Inventor.
What is Inventor?
Inventor is a software which allows you to draw any 3D image you can imagine. Not only are you able to visualize your project but it also allows you to see a simulation of what you drew to know if it will work or not.
Inventor is a software which allows you to draw any 3D image you can imagine. Not only are you able to visualize your project but it also allows you to see a simulation of what you drew to know if it will work or not.
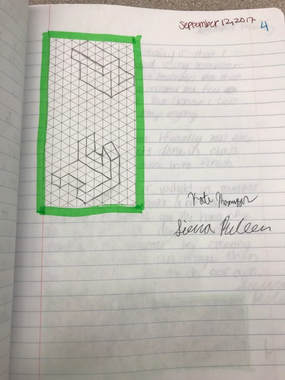
Designer NotebookWe practiced sketching two widgets before we started to use inventor. When we were done we put them into our designer notebooks. Always making sure we had the date and a signature from yourself and a witness.
|
|
For a bit of insight on how we created these I will explain how I made the very first widget.
Widget 1
Step 1: Open Inventor. Click New; Standard.ipt
Step 2: Click on Start 2D sketch and then click on a side that you want to start drawing.
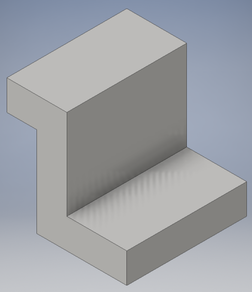
Step 3: Click on line and start to sketch out the Z shape, making sure all of my lines are meeting together with no open loops. When Done hit the escape button.
Step 4: After you are done you need to dimension the Image by clicking on the dimension button. Click on each line and enter the length needed. After all of the dimensions are put in, click on the finish sketch button.
Step 5: Turn your sketch into a 3D image, Click on the extrude button. Make sure the front face of the sketch is clicked on so that it extrudes the correct way.
Step 6: Safe your sketch to your H drive as "LastName_FirstName_Widget#".
Widget 1
Step 1: Open Inventor. Click New; Standard.ipt
Step 2: Click on Start 2D sketch and then click on a side that you want to start drawing.
Step 3: Click on line and start to sketch out the Z shape, making sure all of my lines are meeting together with no open loops. When Done hit the escape button.
Step 4: After you are done you need to dimension the Image by clicking on the dimension button. Click on each line and enter the length needed. After all of the dimensions are put in, click on the finish sketch button.
Step 5: Turn your sketch into a 3D image, Click on the extrude button. Make sure the front face of the sketch is clicked on so that it extrudes the correct way.
Step 6: Safe your sketch to your H drive as "LastName_FirstName_Widget#".
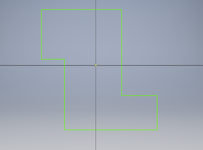
Step 3: Sketching out the Z shape |
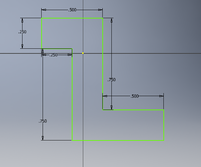
Step 4: Dimension your sketch |
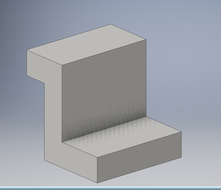
Step 5: Turning your sketch in to a 3D image |
|
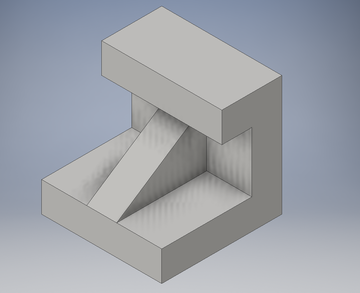
Widget 1
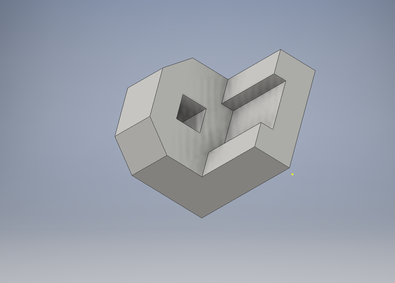
Widget 3
Widget 5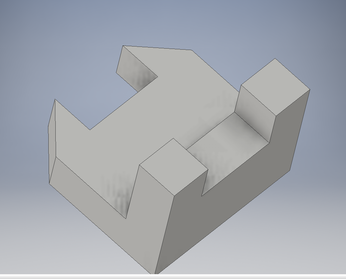
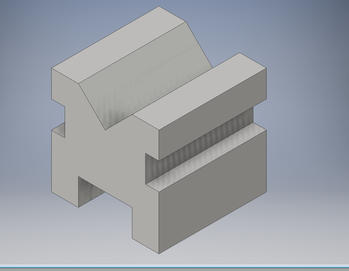
Finished Widget |
Widget 2
Widget 4
|
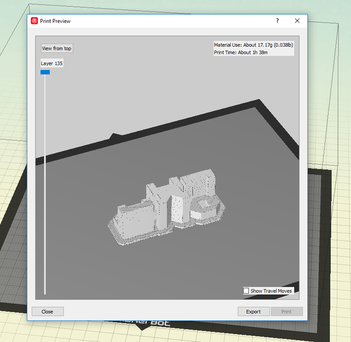
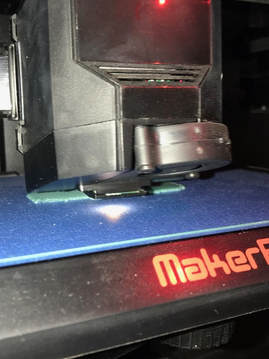
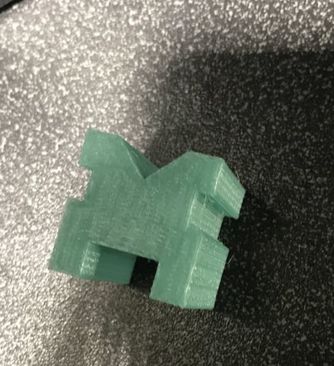
When printing I chose to print out widget 5. My widget is the one in the middle. I printed with two other people in my class so you can see theirs as well. In the Set up screen and in the picture of the widgets actually printing out. And finally of course my last picture is my widget printed out.
|
|
|
What I learned...
After just learning to use inventor, I now know the basics of the software. I could take my knowledge and build something life changing. But for now, I will be able to use my skills to create my own item, problem solving to create the best item for our project that will actually useful. Not only did I learn the new skills, I also learned that I can take a challenge and achieve the outcome. I had a hard time at the beginning but now I got it and I'm glad that I kept trying!
